You're reading the documentation for a development version. For the latest released version, please have a look at master.
Camera Node
Overview
The camera node allows user to connet DaoAI Vision with a physical or virtual camera, from which the image data can be read and used by other nodes.
Input and Output
Input |
Type |
Description |
|---|---|---|
Camera Source |
Camera Name |
Selected from a list of Camera Names added in Platform Configuration |
Output |
Type |
Description |
|---|---|---|
image |
Image |
Captured image |
pointCloud |
Cloud |
Captured point cloud |
DepthMap |
Image |
A depth image converted from point cloud. has been normalized, so it do not contain absolute depth
information. can be used for depth comparison and visualization, we cannot use it as a depth map.
|
intrinsicParam |
CameraIntrinsics |
The camera intrinsic of camera. |
Node Settings
The following screen shot demonstrate camera node settings
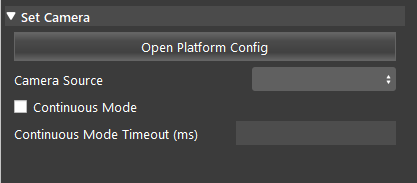
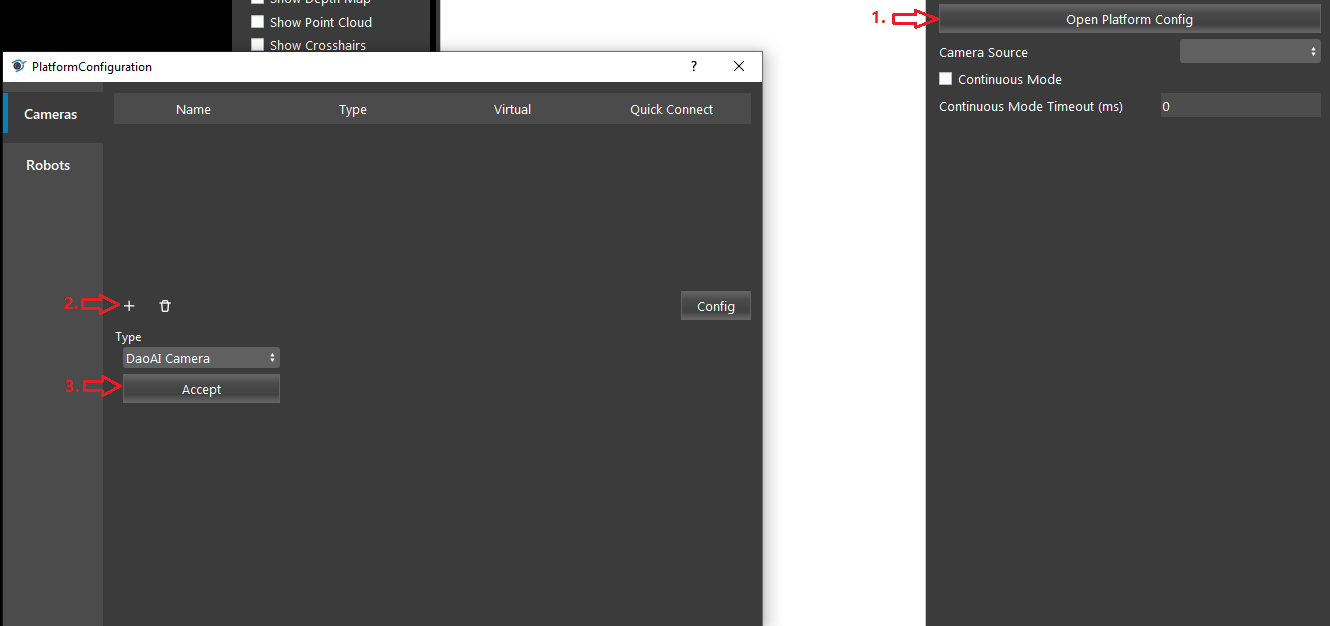
Open Platform Config: Click to open the Platform Config where you can add and connect cameras.
Continuous Mode: Toggle continuous mode, when toggled, running the Camera node will continuously capture image until user stop.
Continuous Mode Timeout: The time interval which the program should wait between continuous image captures.
Enable Logging: Toggle logging option, when toggled, an output file will be written to [Workspace_dir]/Log.
Procedure to Use
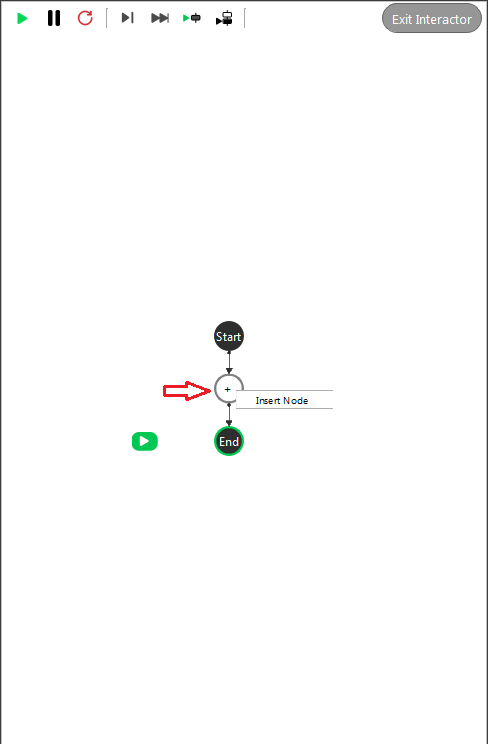
Right click the ‘+’ sign and click ‘Insert Node’.
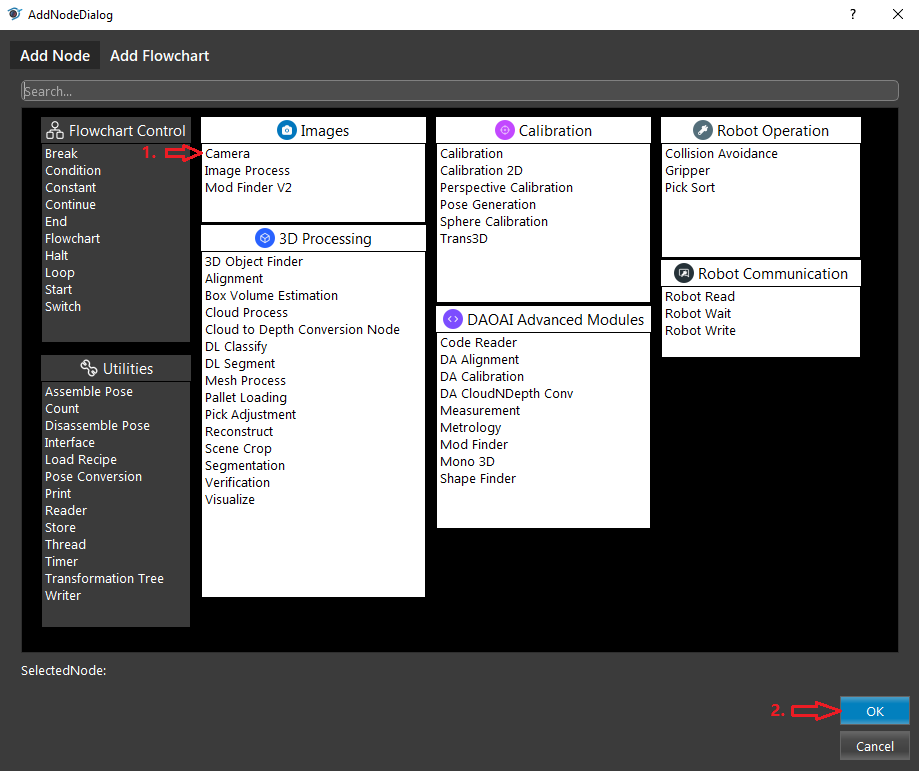
Select Camera node and click OK.
Click Platform Config and add Camera by clicking the ‘+’ sign and then click accept.
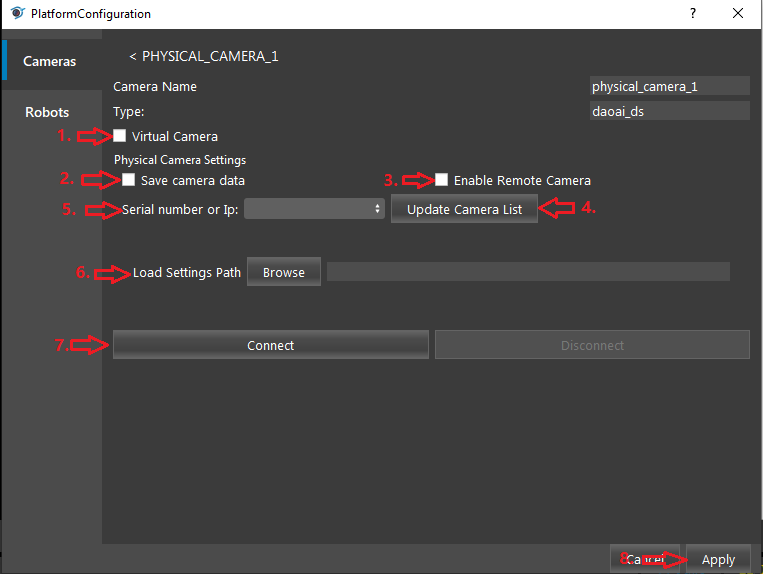
Connect to a physical or virtual camera
- 4.1. Connect to a physical camera:
Leave the virtual Camera checkbox unchecked.
You may optionally check the ‘save camera data’ checkbox if you wish to also save the camera data to your file.
You may check the ‘Enable Remote Camera’ if your camera is connected through network.
Click Update camera List
Click the expand arrow in Serial number or IP and select your camera from the list.
You can choose to load an optional camera configuration (.cfg) file generated through DaoAI Camera Studio.
click connect.
click Apply.
- scale:
100%
- 4.2. connect to a virtual camera
Check the virtual camera checkbox.
Select “From File” to load a single file.
Click browse to select file.
Click Apply
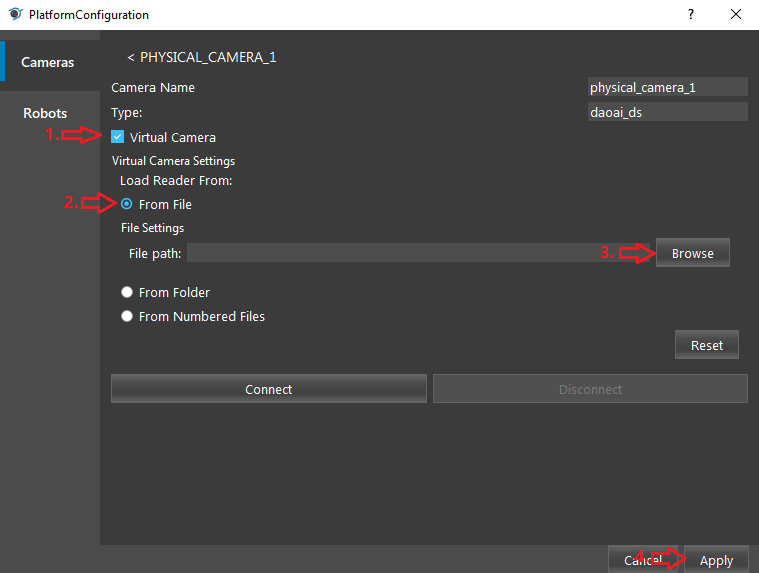
4.2.1. Select From Folder to load all files from folder, the camera node will read image sequencially in the folder
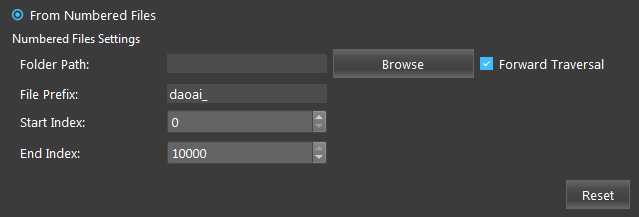
4.2.2. Select From Numbered Files, and select a folder path, specifiy the file prefix and start/end index.
The camera node will read image sequencially in the folder for filenames began with the speicified prefix and ordered by their index.
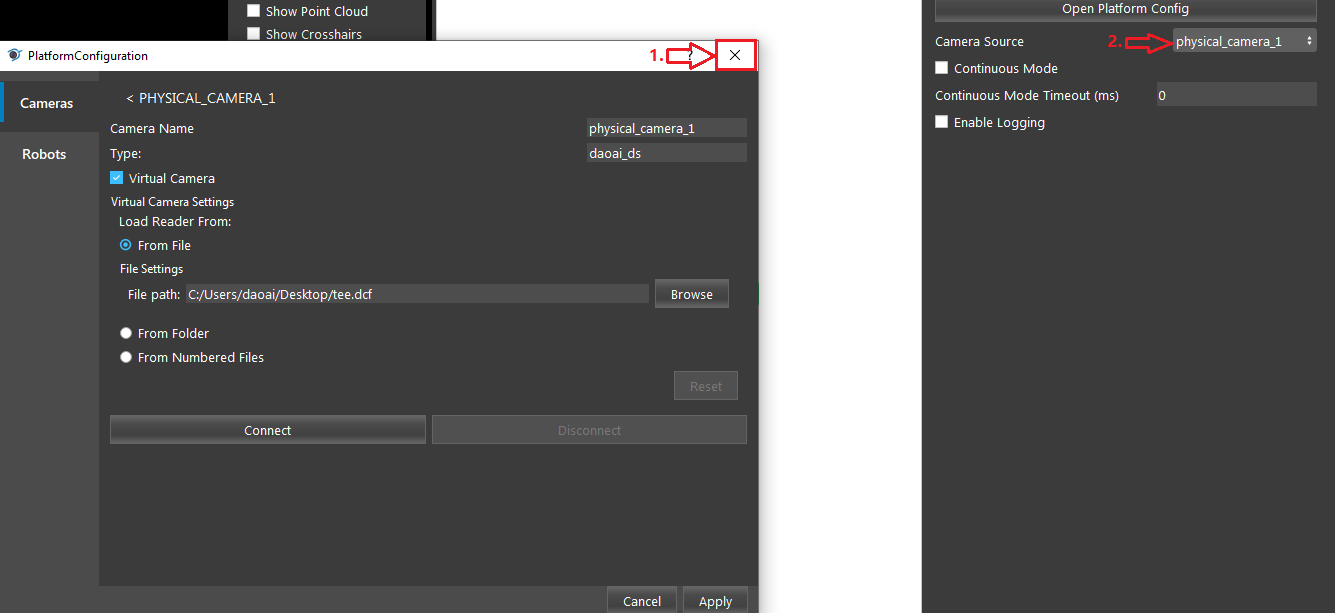
1.Close the Platform Configuration window, 2.select camera Source
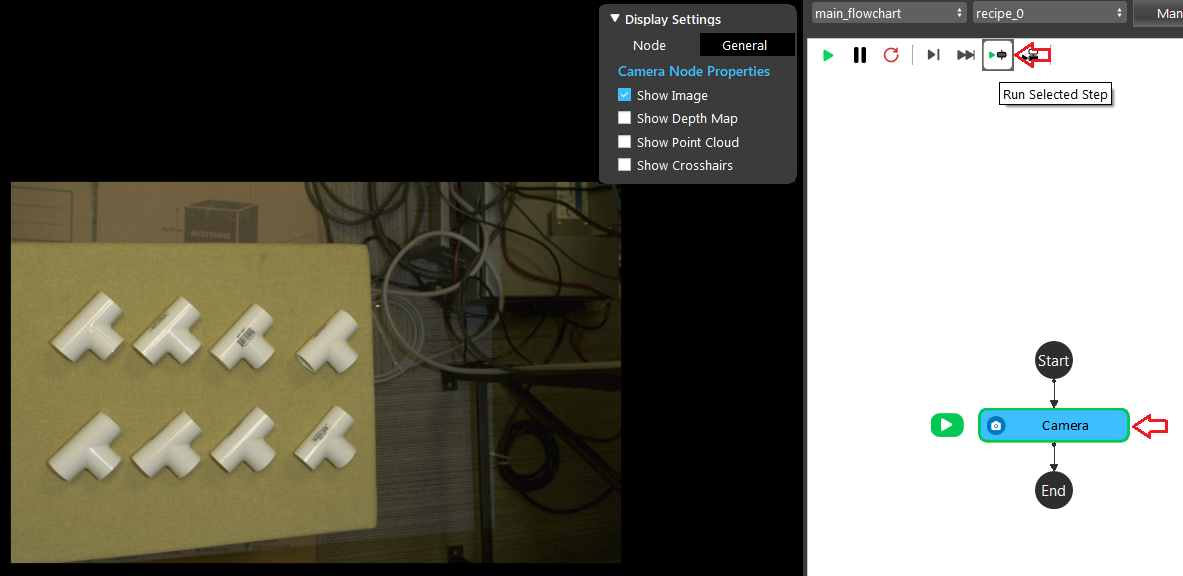
Select the camera node if its not selected already, click run select node, and you should be able to see the image on the left view port.
Excercise
Here’s a link to .dcf file which can be used as input to virtual cameras.
Try to create a camera node in your workspace, add a virtual camera that reads the .dcf file , and run the camera node to display the image in the .dcf file.

