Virtual Testing
Virtual testing is essential before testing the project workspace in real robot. This step could help to ensure Vision does not send the wrong (dangerous) poses to robot. It is to verified the workspace correctness as well as to ensure the safety of users and hardware. The following virtual robots are good for virtual testing:
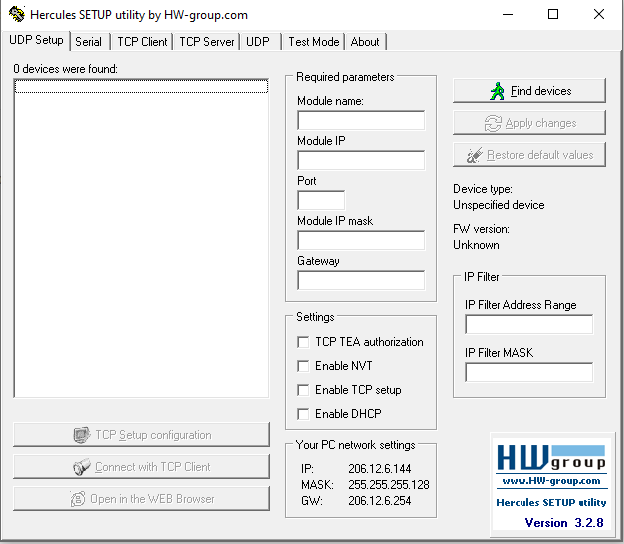
Hercules
Hercules is effective for functionality testing of the workspace. Hercules is easy to use, faster responsive for communication between Vision and Hercules.
Connection
First of all, we need to connect Vision and Hercules.
On Vision side, open Platform Configuration , choose Robot option. Following the image below, select Other as Robot type, then click + .
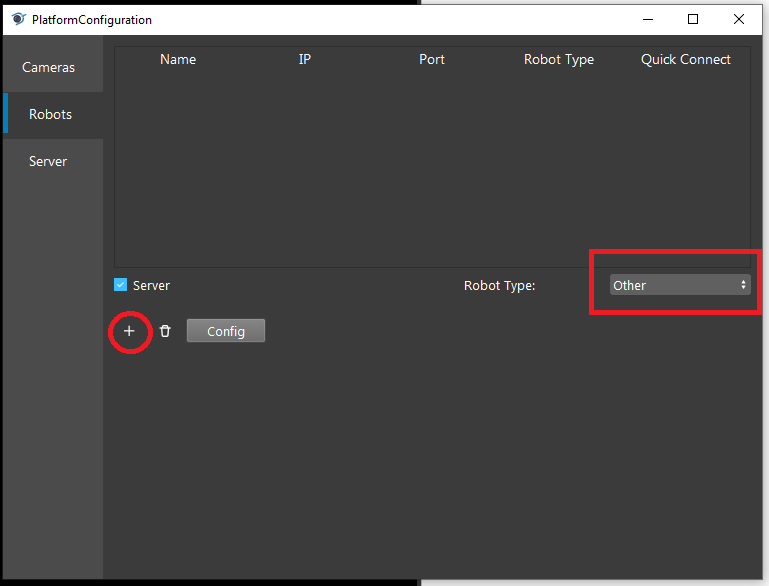
Then, you should see the config page like below:
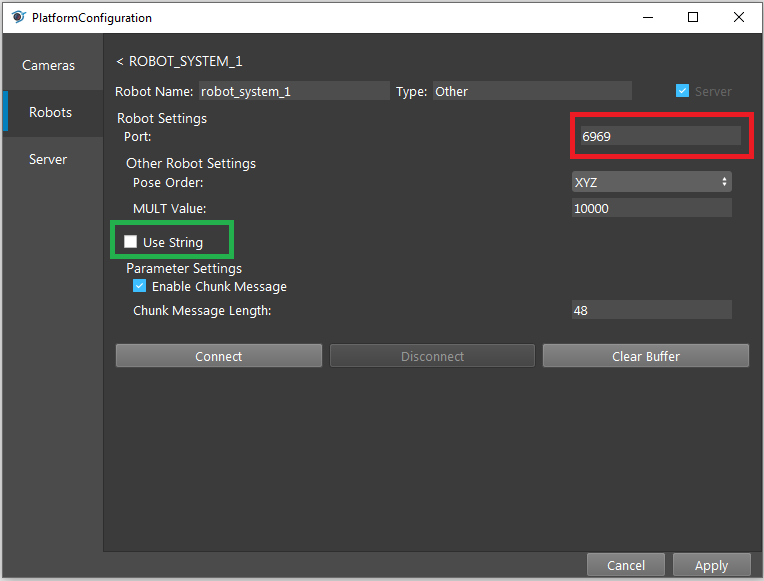
Port number can be modified to any number, this would be useful when connecting multiple robots.
You can leave it as 6969 when only connecting to 1 robot.
Select the option Use String for Hercules, since Hercules is sending a String to Vision to simulate the real robot communication.
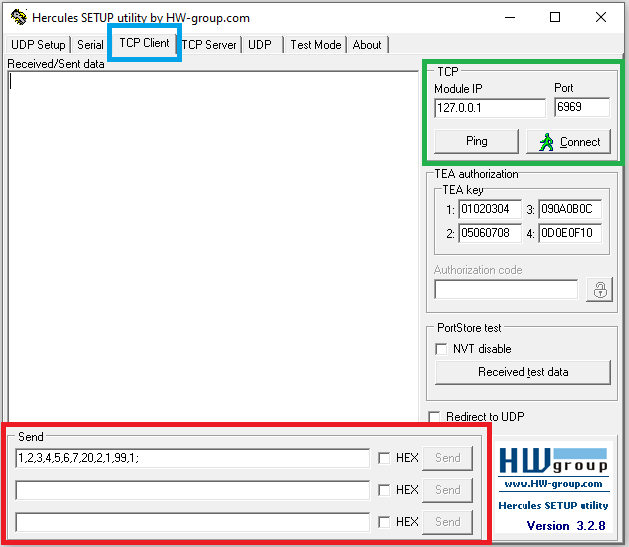
On Hercules side, select TCP Client , make sure the Module IP and Port is correct: 127.0.0.1 represents self, the current pc which the same as Hercules; Port is defined from Vision side, connecting with correct Port number.
Then click Connect .
The red box is the messages templates which would be sent to Vision while connection is established.
Communication
Communications require requests and responses. Vision is the communication Server and Hercules is Client in this communication.
Hence, Vision would always wait for a Robot Read before Robot Write , without requests from client, server would not send anything to client side.
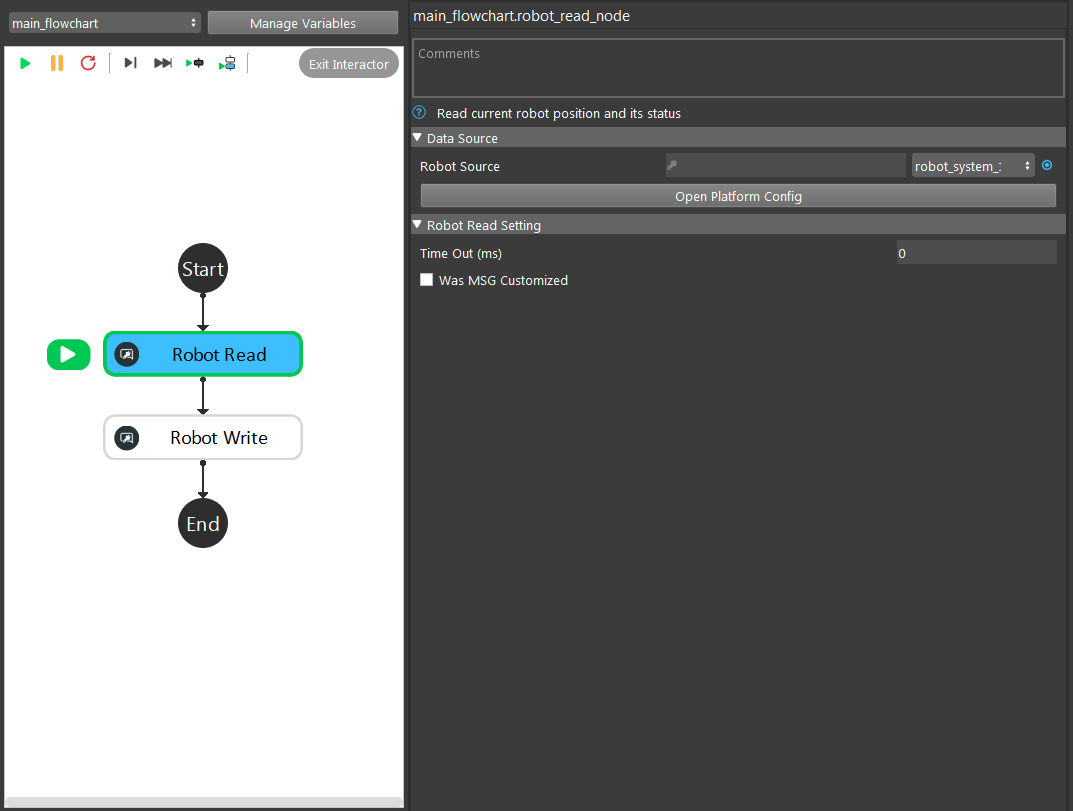
These 2 nodes are the main communication nodes between Vision and Hercules. Robot Read would always wait for requests from Hercules, without any requests, the flowchart would be waiting at Robot Read until requests come in.
You also able to set a Time Out for this node, it could be helpful when there is connection issue between Vision and Hercules.
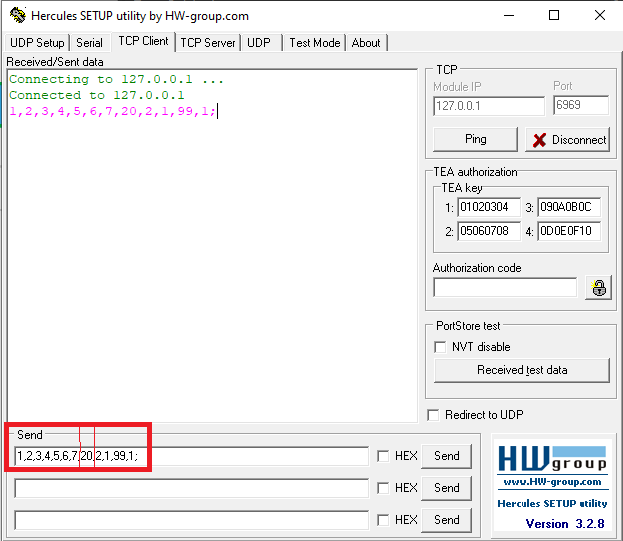
Hercules sends a string to Vision . Console would shows the details of this request.
The fifth index of this message is the command of this request.
Different command has different meanings to Vision , it tells Vision what kind of operations robot is working on, as well as the status of previous response. The next indexes after command is playload_1 and payload_2 .

Vision would response to Hercules with Robot Write .
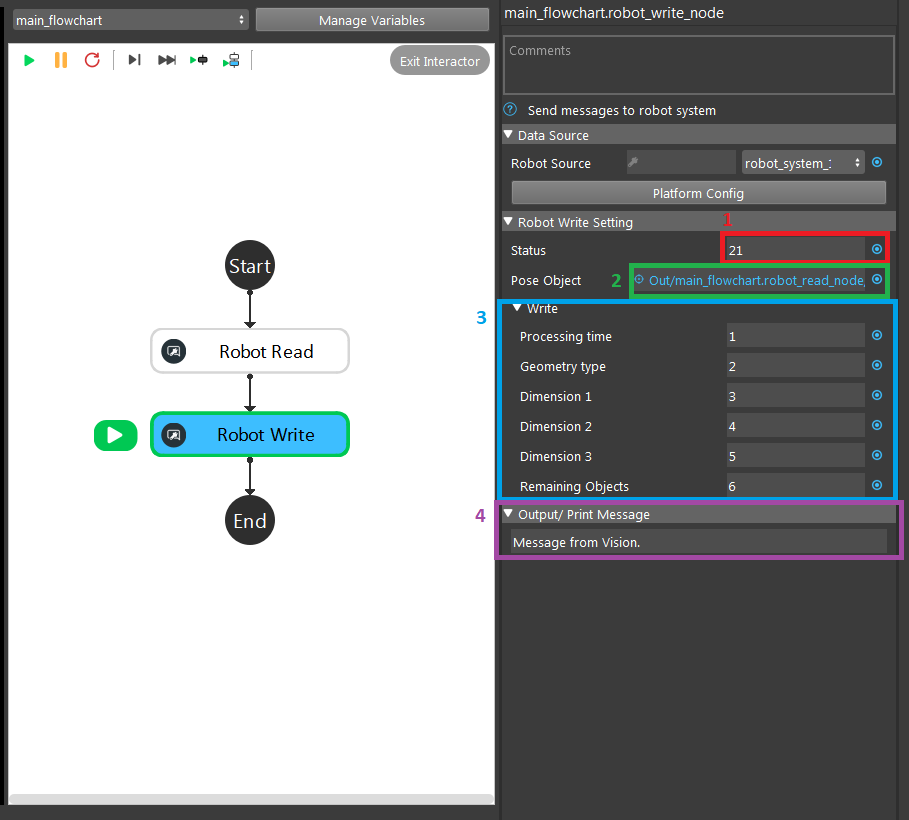
The setting details are below:
Status is important, it is the response command to robot, which tells robot what is the next operation.
2. Pose Object is the pose which robot should perform. During Picking process, Vision would combine the object coordinates and picking pose in to this object, sending it to robot in order to perform picking.
If we want the robot holds still, only transmitting command and payloads: we could send back the pose which is read from Robot Read , the robot will stays still.
Processing time is the
payload_1for robot, Geometry type ispayload_2.This is optional if you want to print message on the console window, put down the message here.

VMware UR Robot
Using virtual machine to simulate UR robot with Vision is another way to test the workspace virtually. This test can be able to run the workspace closer to real world condition, which is essential before delivering.

VMware is free to download online, we use VMware Workstation 16 player in this document. Download and install it. It might require to change the BIOS setting in order to have it working.
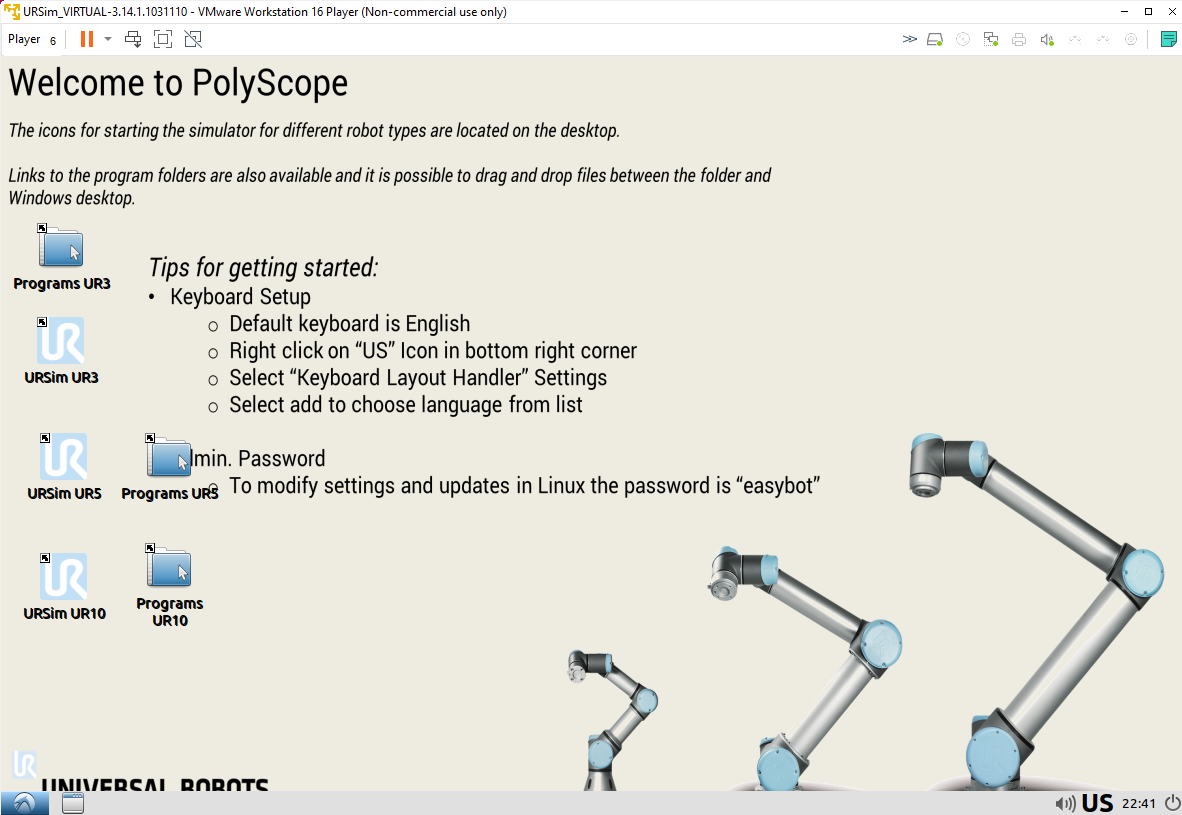
After setup should looks like this.
In our example, we use UR5 robot to perform the testing, for details of operation UR: UR-Robot
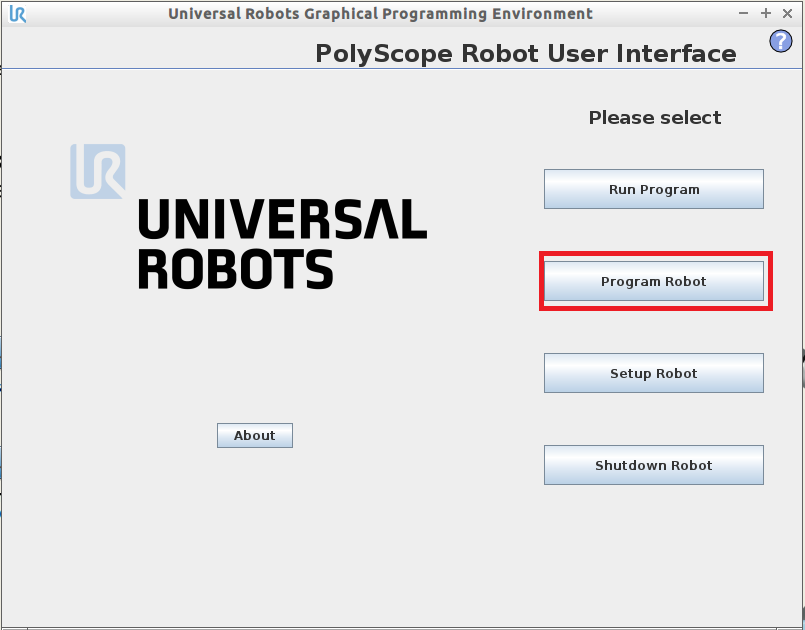
Click on Program Robot , you can run the robot simulation as well as change the program for different purpose. Then Load Program .
We can see there are many different urp files in this directory. We can use:
Manual_Calibration.urp for cheese board manual calibration;
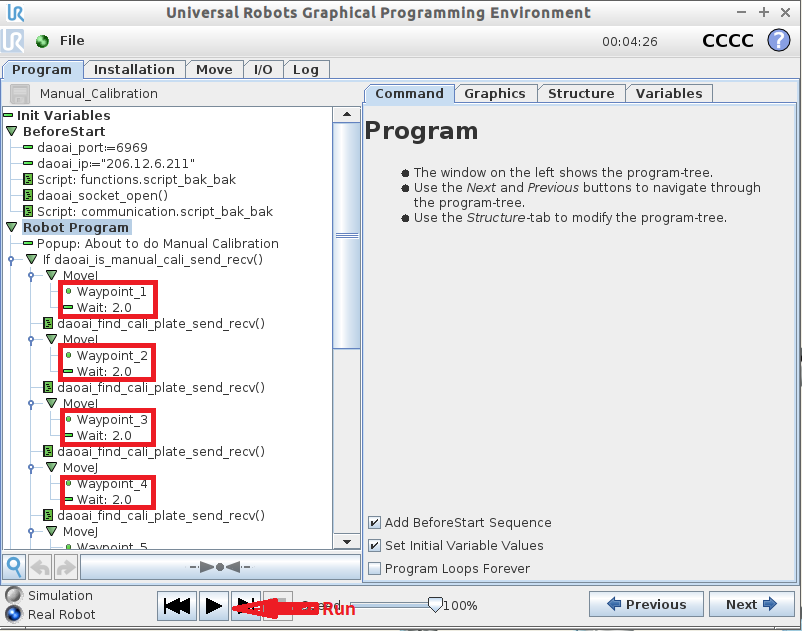
In real world robot, you need to setup all the waypoints for calibration.
Picking.urp to perform picking test;
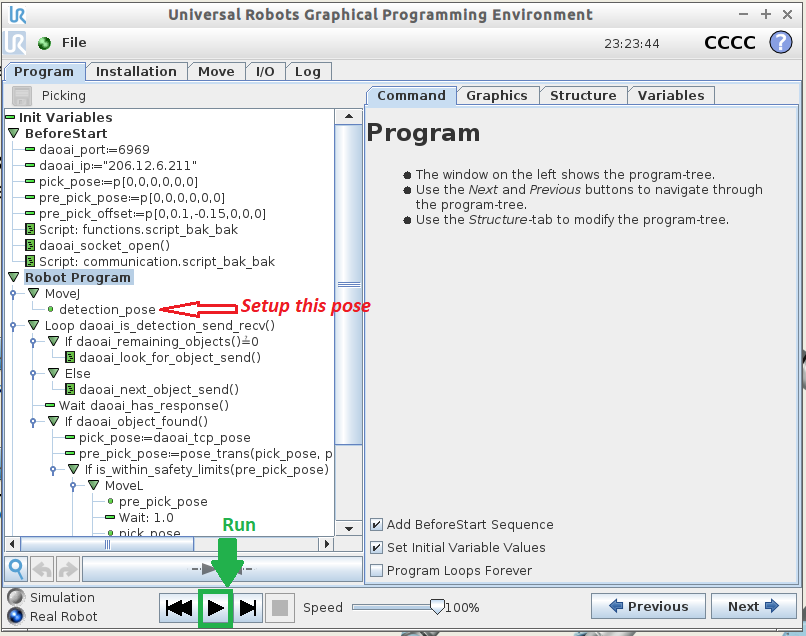
In the real world robot, you should change this detection_pose: this is the robot pose when Vision is performing detection process. This pose should be away from the camera(At lease not blocking the object in camera), so that camera is able to capture the scene cloud to detect the objects in scene.
send_pose.urp to perform pose define.
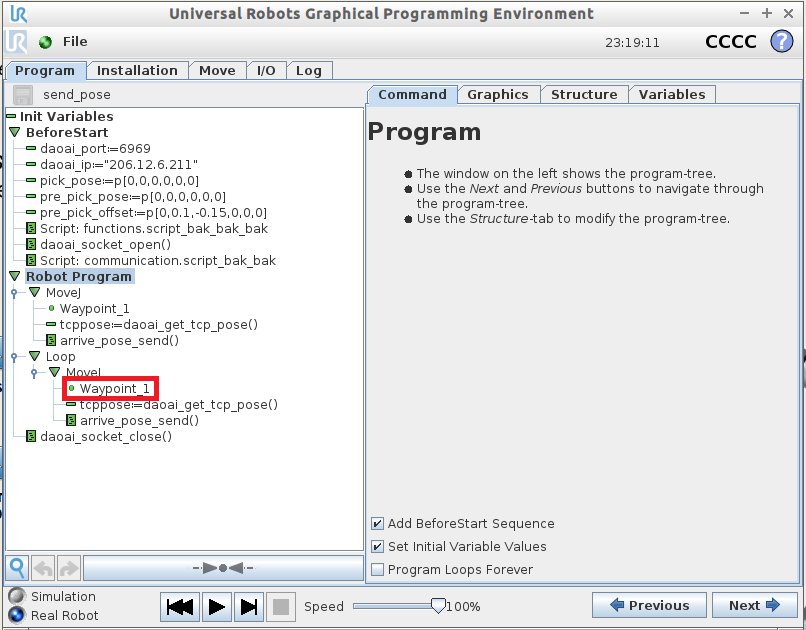
In real world robot, we need to change this waypoint to a correct picking pose for the object. However, in virtual robot test, this is not require.
Note: We will use Picking.urp as sample for the following demo.
Connection
Connecting with VMware robot is similar with Hercules in Vision .
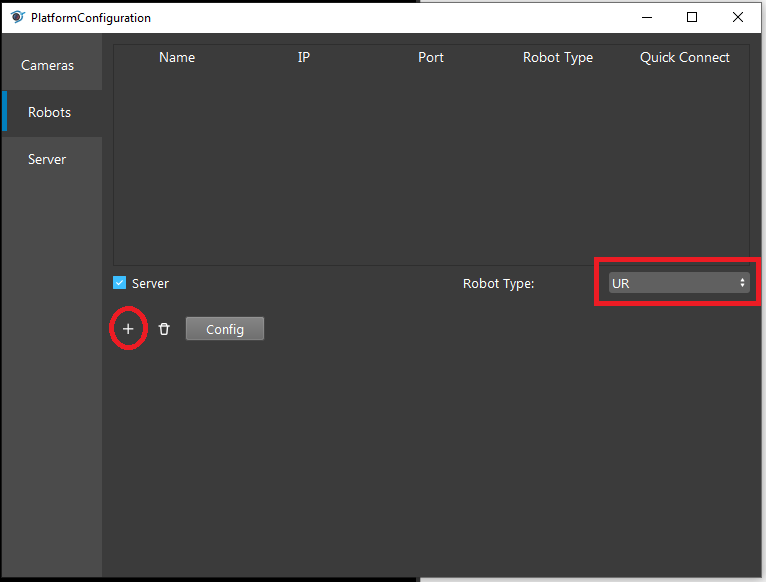
On Vision side, open Platform Configuration , choose Robot option. Following the image below, select UR as Robot type, then click + .
Then, you should see the config page like below:
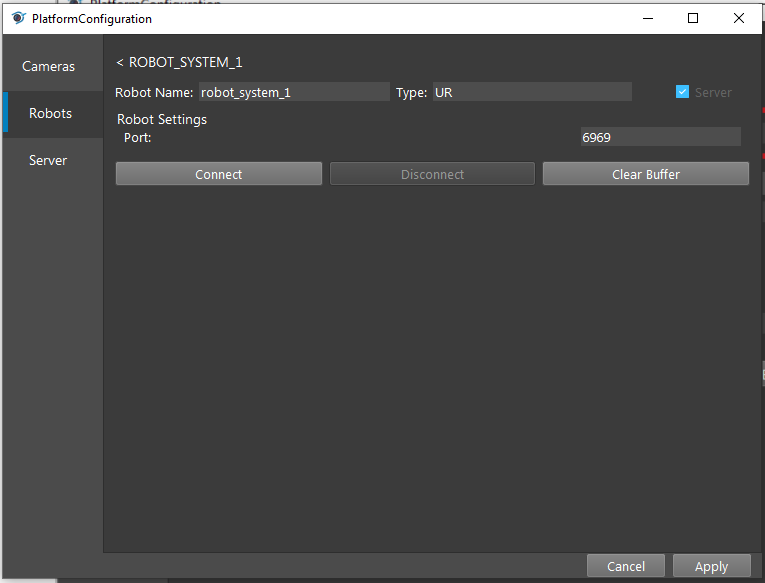
Click Connect to connect Virtual UR robot to Vision , Clear Buffer can clear the existing buffer for Vision and Virtual UR robot.
Port number can be modified to any number, this would be useful when connecting multiple robots.
You can leave it as 6969 when only connecting to 1 robot.
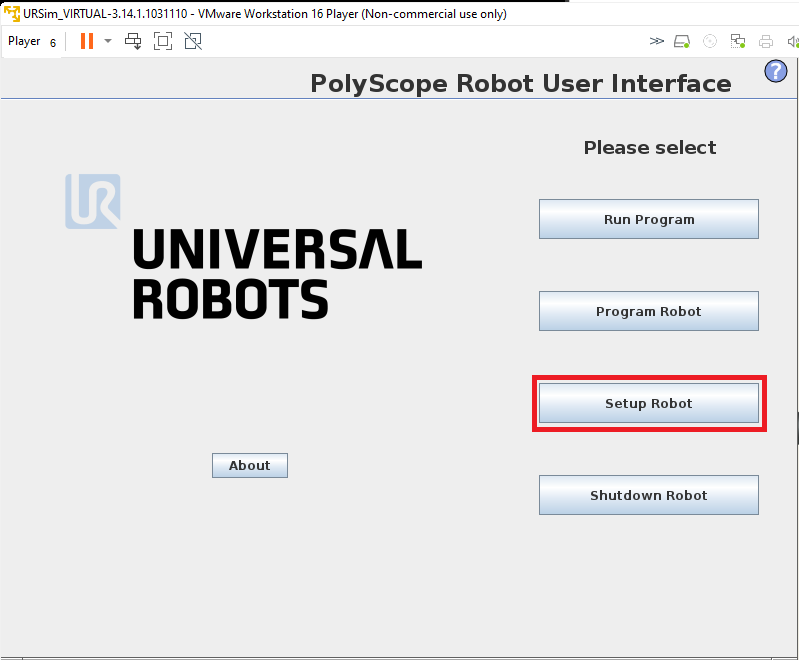
On UR side, click on Setup Robot then select Network .
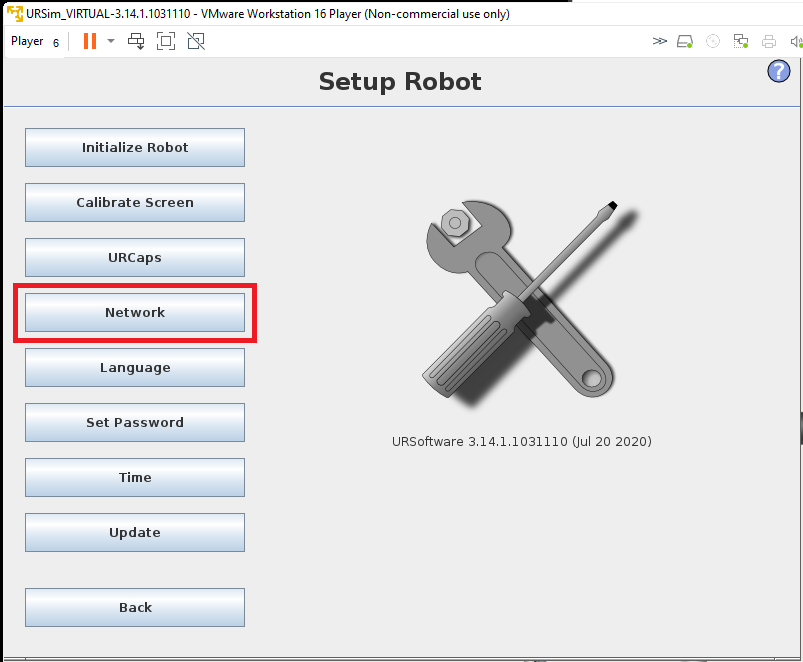
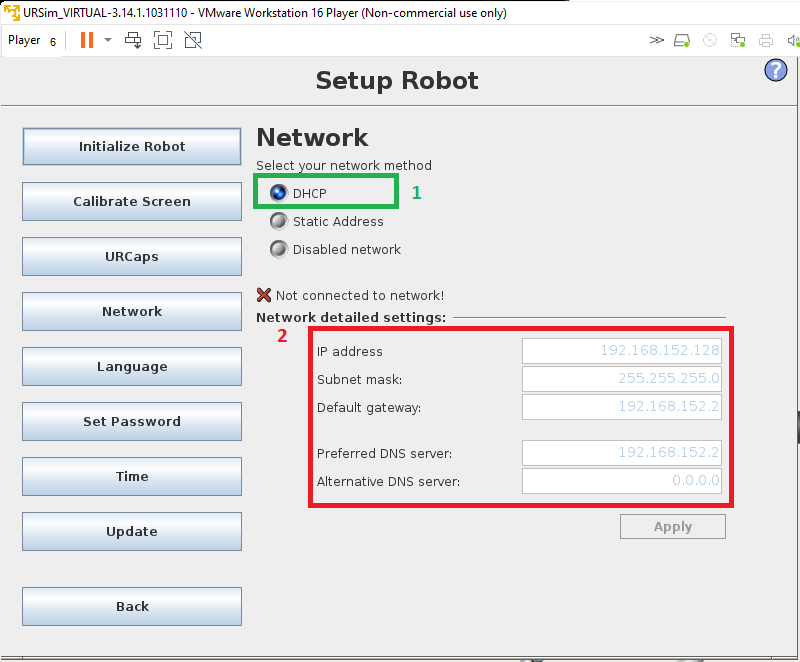
Network setting should be DHCP and use the above IPs. This will connect to Vision .
Then loading the urp file for Calibration, Send pose or Picking. In this example, we loaded Picking.urp:
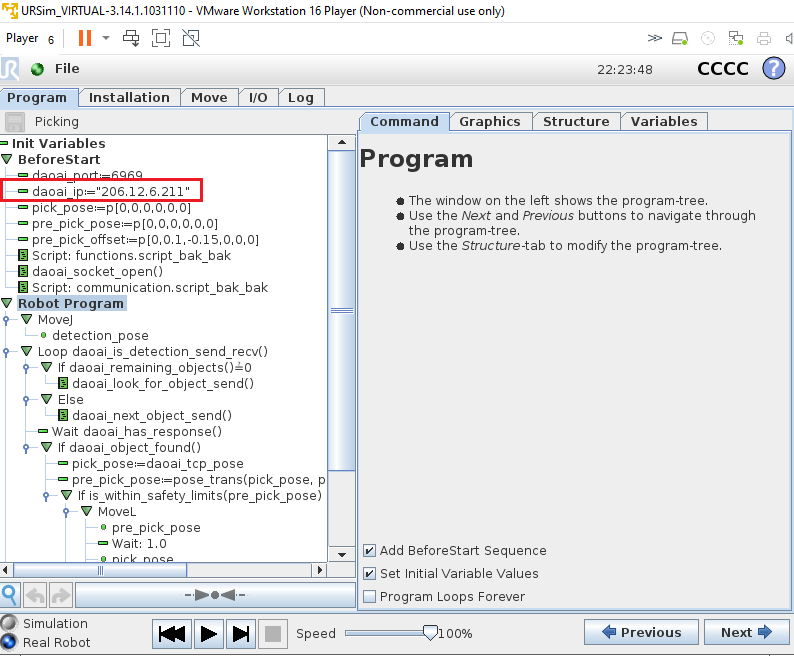
Inside of the urp file, we can see there is a field daoai_ip , select this field and click on the Expression .
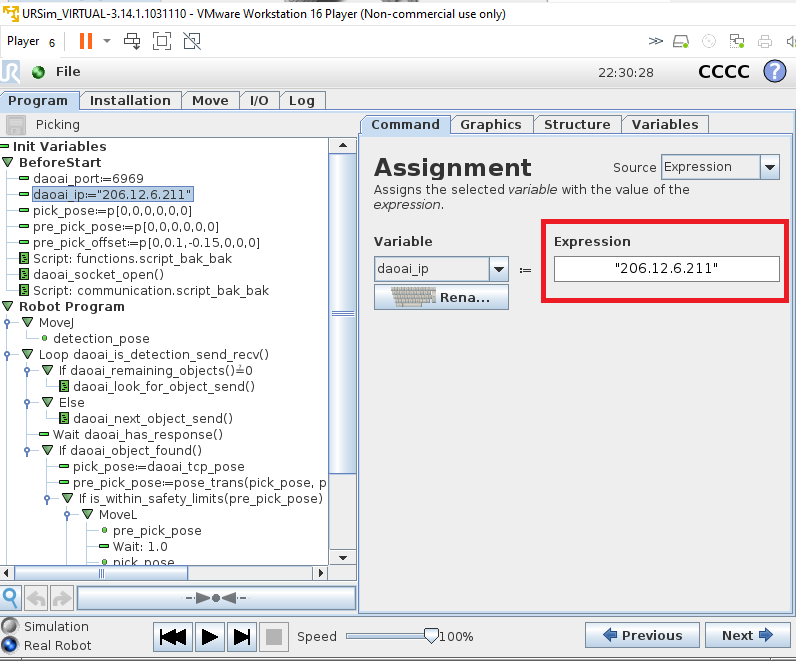
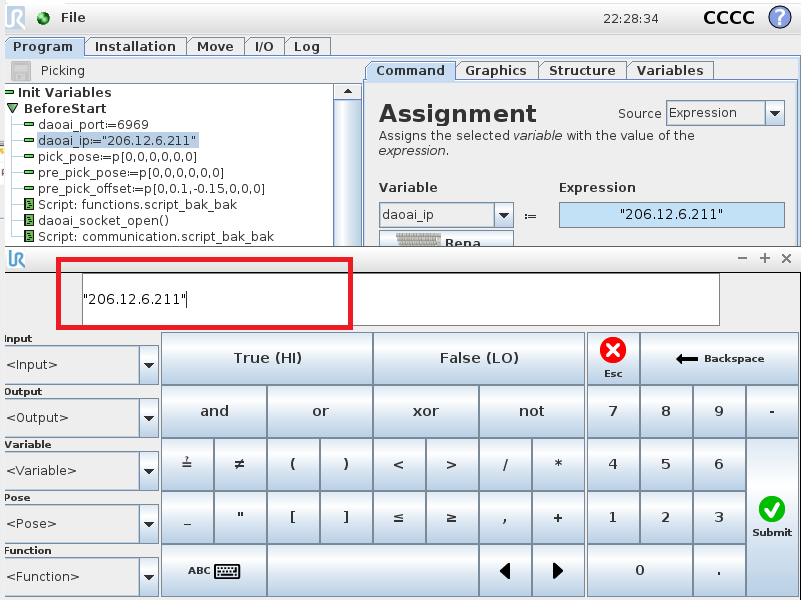
Change the IP to corresponding IP address. You can check the IP address in cmd then enter ipconfig to check IP address on the PC.
Communication
Communications require requests and responses. Vision is the communication Server and Virtual VM robot is Client in this communication.
Hence, Vision would always wait for a Robot Read before Robot Write , without requests from client, server would not send anything to client side.

In this Picking.urp we have all the robot loop through the picking process and keeps receiving the pose from Vision as long as there are pickable poses.
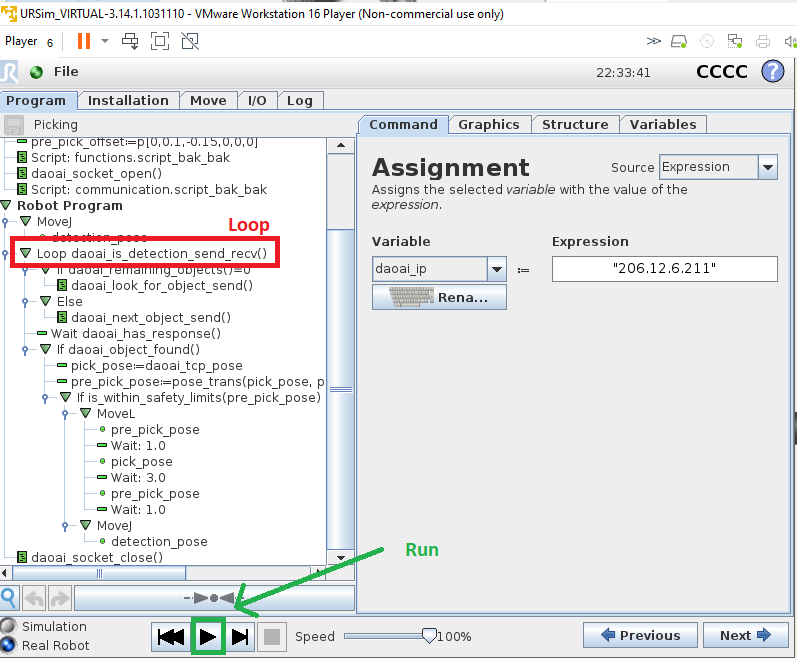
We click on the Run button on UR and Run on Vision , they will keep communicating and send/receive as long as the robot script matches the communications(Robot Read and Robot Write ) on Vision .