You're reading the documentation for a development version. For the latest released version, please have a look at master.
Pick Sort Node
Overview
The Pick Sort Node sorts the order for picking up objects according to different sorting types. Each type of sorting is based on a reference axis passed in(X, Y, Z). Depending on the preference from a user(ex. pick from the top first), it will output the order for picking.
Input and Output
Output |
Type |
Description |
|---|---|---|
sortedObjects |
vector<Pose> |
The output sorted list of objects for pick up. |
sortedOriginalIndices |
vector<Int> |
The mapping of the original indices and there new positions. For example if the original input is an array of size 5. This output may look like this [3, 1, 5, 2 0, 4] where the new index 0 is the original index 3. |
sortedPoses |
vector<Pose> |
The output sorted list of gripper positions for pick up. |
Node Settings
The following screen shots demonstrate the settings of the pick sort node.
Source Parameters
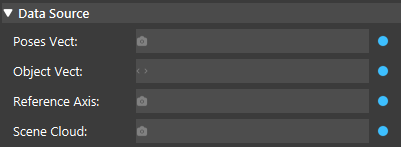
Poses Vect:
A list of available poses of gripper to pick up objects. This input is optional and can be left empty and will be ignored. And if linked to gripper poses, the pick sort node will also sort the gripper pose corresponding to the object sortings.
(Can use the output of the Collision Avoidance node)
Object Vect:
A list of objects that is able to be picked up. This is the parameter that we use to sort by. If the Poses Vect is not left empty there must be a 1-to-1 correspondence between the poses and object.
(Can use the output of the Collision Avoidance node)
Reference Axis:
The reference axis used to sort the picking order. This can link to the Cloud Process Node using “Set Reference Frame” operation.
Scene Cloud:
The source point cloud.
Pick Sort Setting

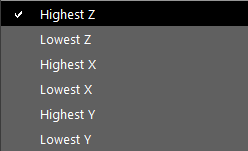
Sort Type: (Default value: Highest Z)
Align Poses Orientation: (Default value: None)
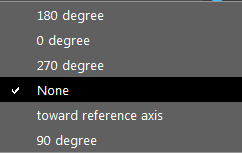
This operation aligns the orientation of poses with the x-axis of the reference coordinates.
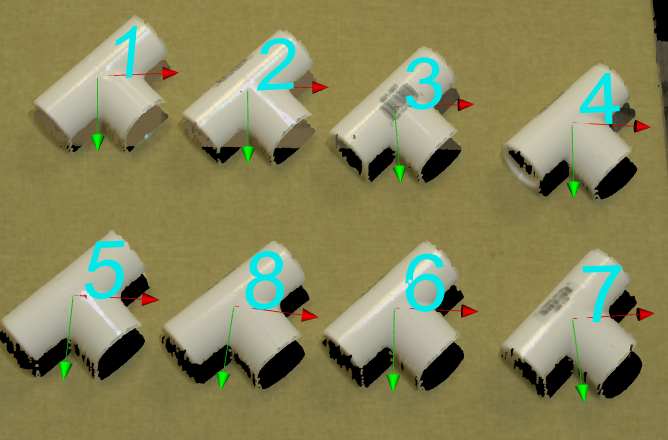
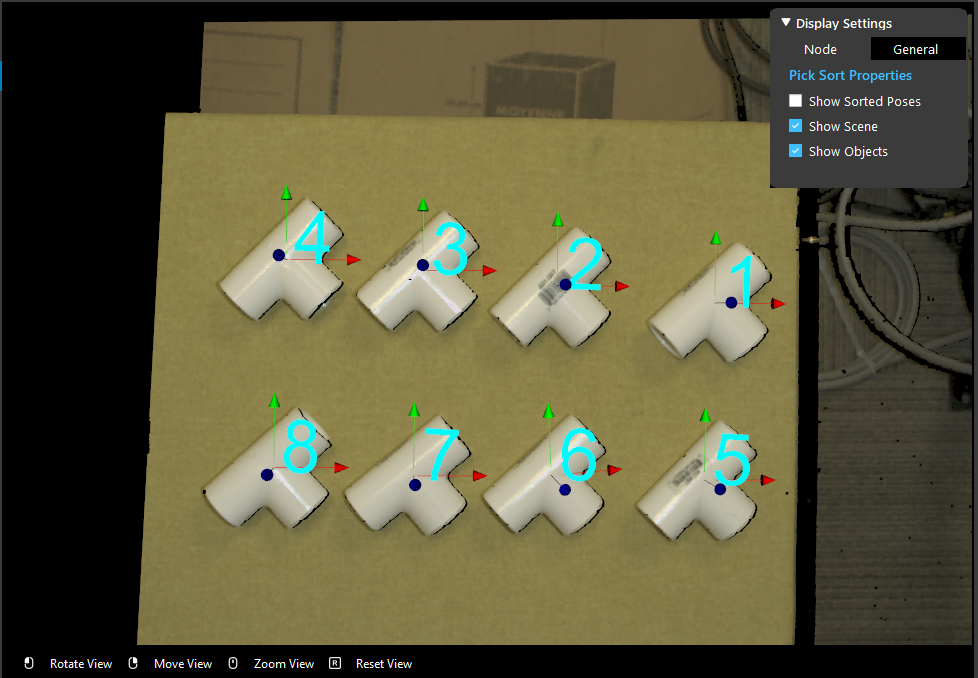
0 degree: the x-axis of objects align with the driection of the x-axis of the reference axis. For example, if the reference axis is set like the image below:
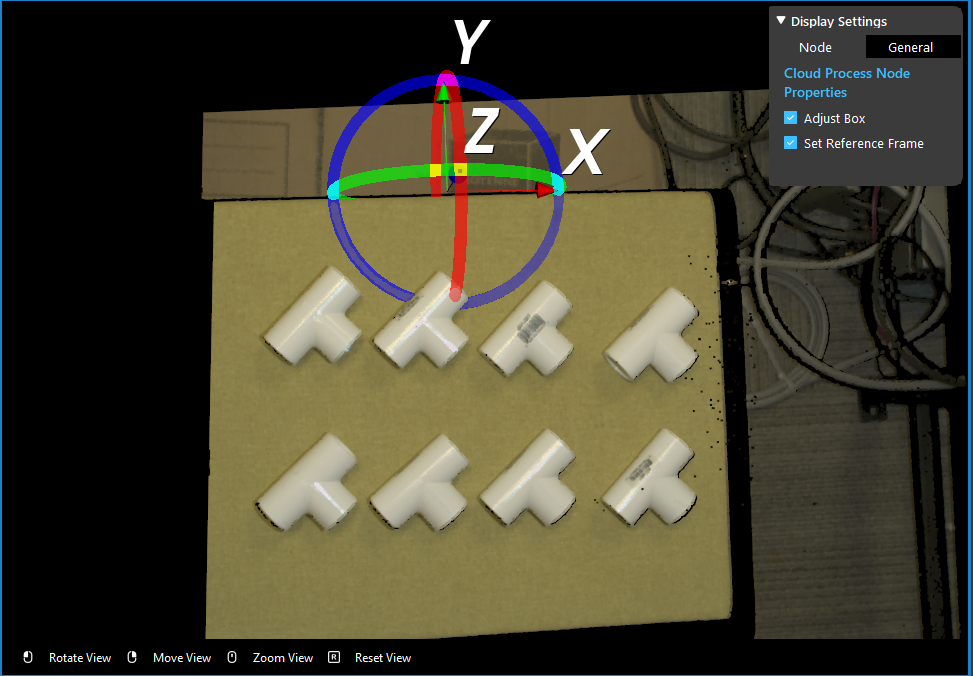
The poses of the objects look like:
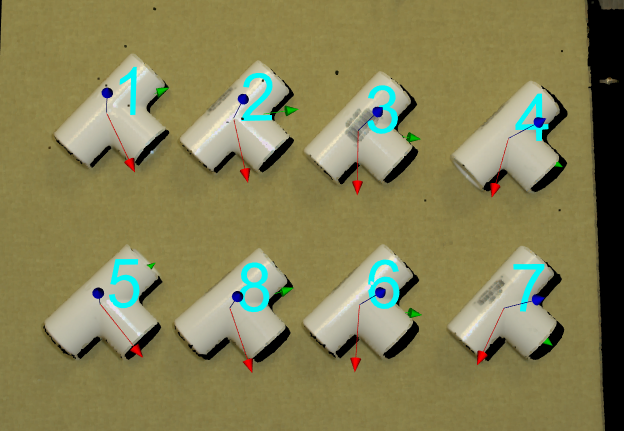
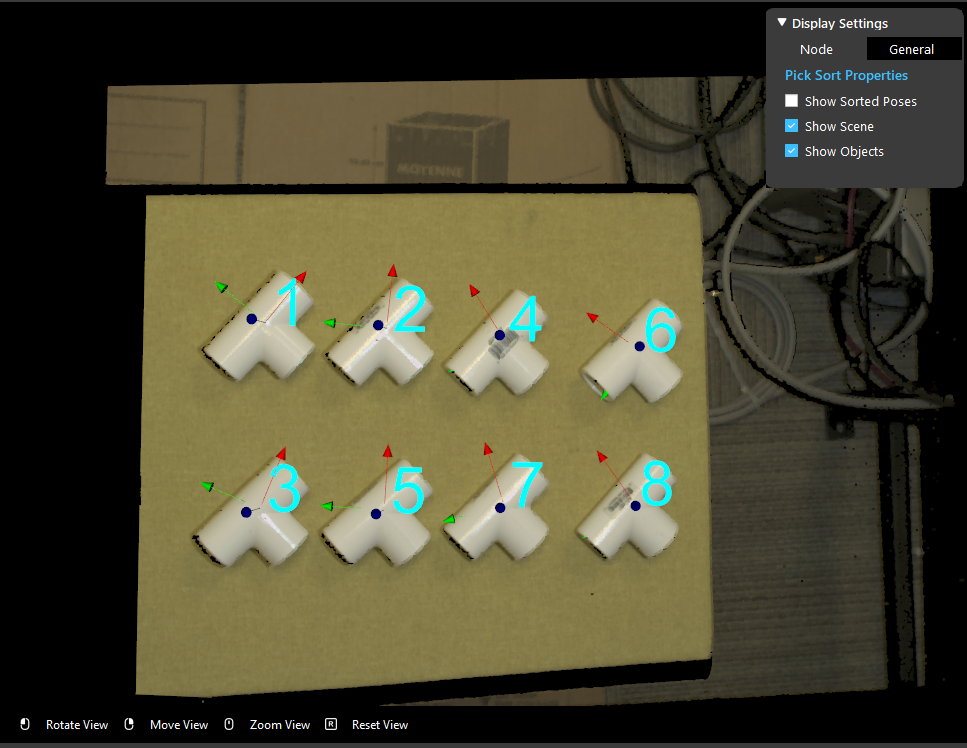
toward reference axis: the x-axis of objects point toward the origin of the reference axis. For example, if the reference axis is set like the image below:
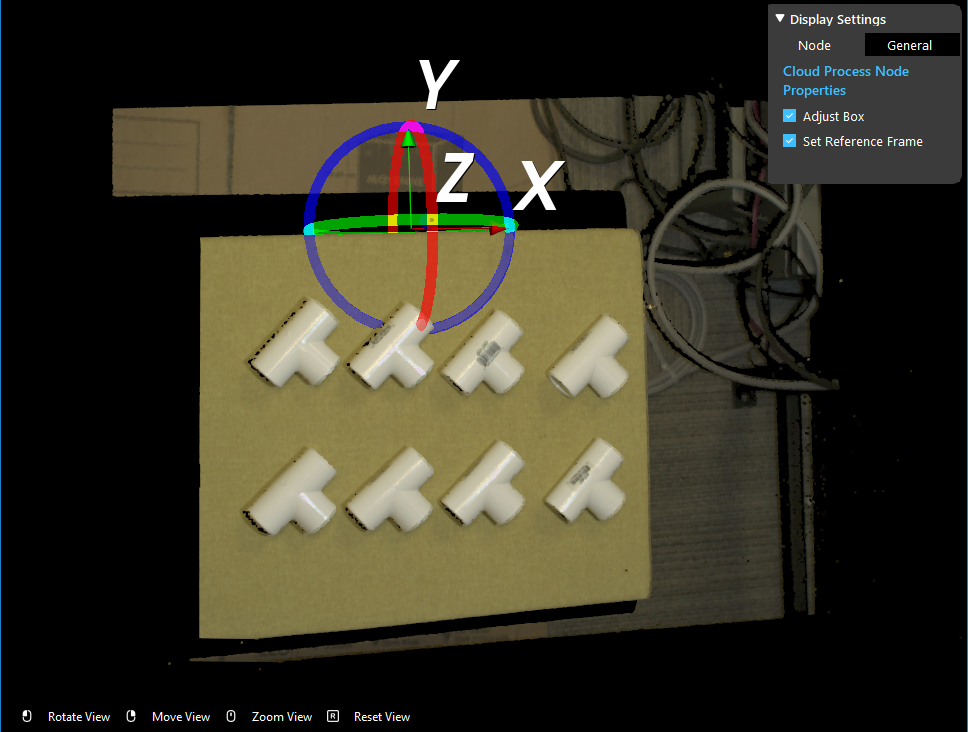
The poses of the objects look like:
Lock Poses Z Direction: (Default value: None)

Fix the Z direction of object poses. For example, if “Positive” is selected, all of the poses will have positive Z relative with the z-axis of the reference axis. This feature is helpful when the target object is detected facing down, but it can only be approached from the top. This feature can make the objects all have positive/negative Z direction.
Procedure to use
Take an image

Set the reference Frame

Detect 3D position of objects.


Link inputs and run the pick sort node. This is set to sort by the highest Z with a “Align Poses Orientation” of 90 degree.

Pick Strategy
In this section, we will be talking about how to apply some other nodes/functionalities to alter the picking strategies. There are 3 strategies can be applied to our picking pose:
Picking objects with designated orders;
Altering the picking rotations for objects;
Limiting the tilt of picking poses;
Object Orders
We will be using our RGB Mod Finder template as our example. This section we will skip the details of Detection flowchart, you can check out this article for knowledge about Detection.
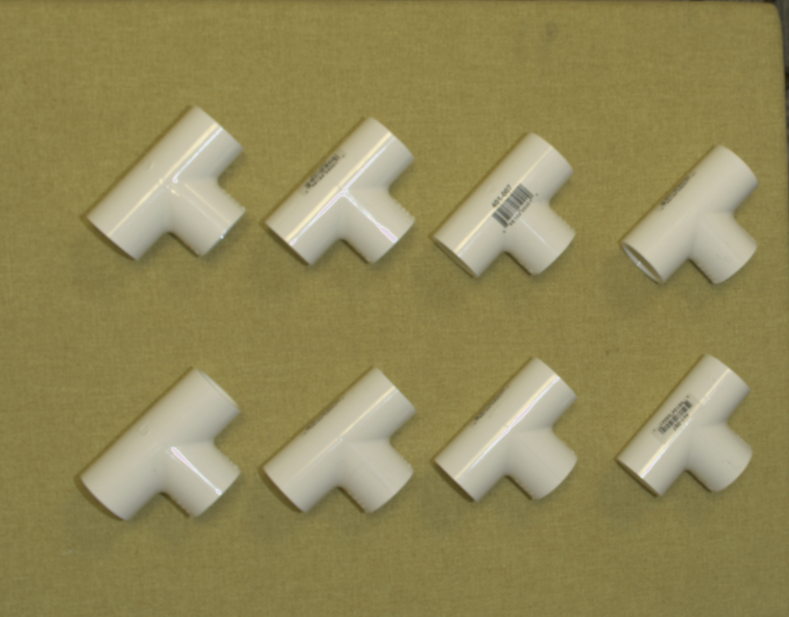
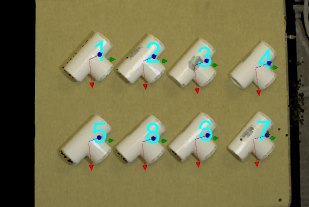
In the image above, you can see there are 8 objects in scene. For industrial productivity, time is valuable for factories. Therefore, picking multiple objects within one image capture is usually required. When thinking about more complex industrial environment and requirements, objects might stack on one and another. Solution to such problems is to sort the pickable objects then picking them one by one(if using one robot). Increasing the amount of robots can be also helpful, but note that robots might have potential collision when 2 or more robots are working in the same area. We will discuss about this in the later section of this article Collision Prevention.

Pick Sort is the node which sorts the pick poses.

Linking all the inputs for Pick Sort node, then you can use the the pick sort setting to sort the poses.
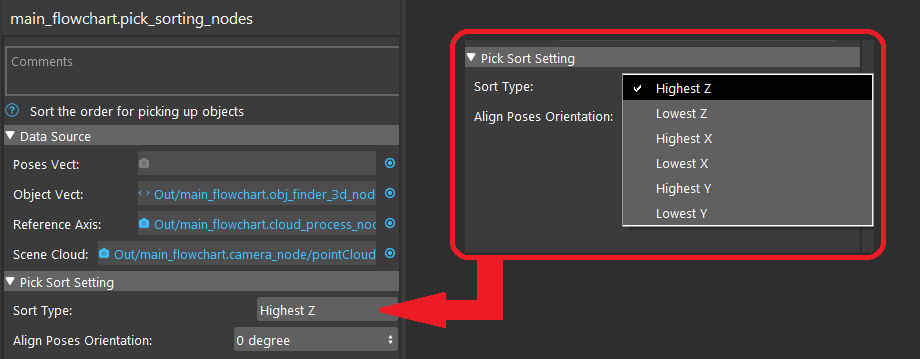
You choose the orders which sorts the poses. Highest Z represents the poses will be sorted in decreasing order of Z value. The output of Pick Sort node is a vector of poses which ordered from highest Z to lowest Z.
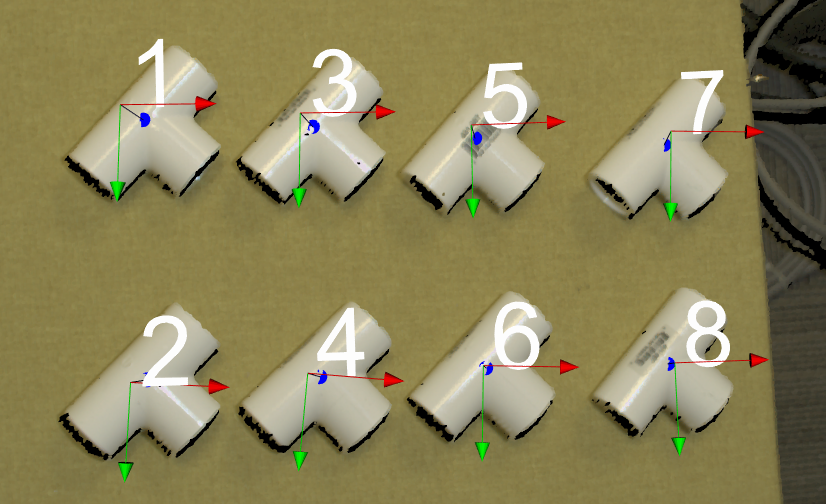
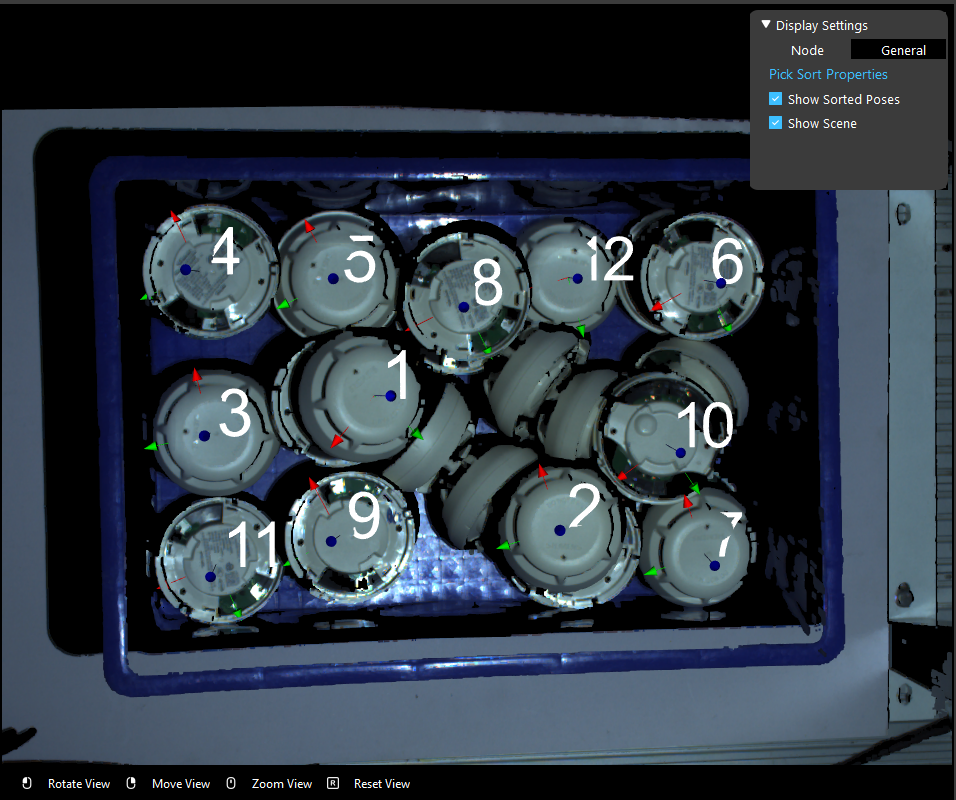
Now the poses have sorted and you can see the label of these objects. 1 will be the first object to be picked, then 2 and so on. This feature is useful especially when encountering the stacking and overlapping objects like image shown below.
Pick Pose Rotations
Continue from Object Orders, you can see that the smoke detector is circle shape object, the any pick pose rotates from Z-axis will the providing the same pick pose in real life. But note that, robot is not human, they don’t know if the pose can be rotates in any directions or angles. The robot will perform picking with the pose’s x, y, z, rx, ry, rz values.
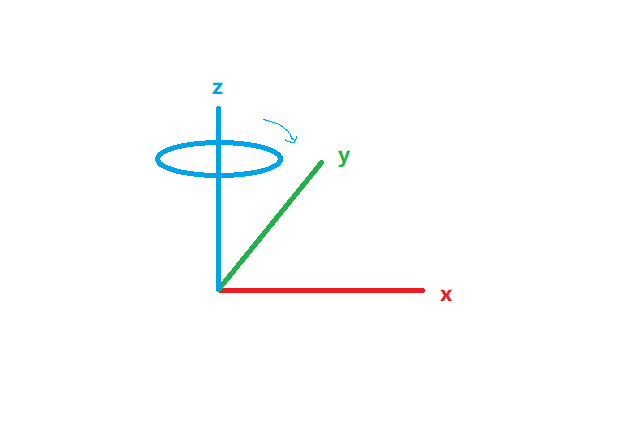
Therefore, in concern of efficiency, we should ask the robot to ignore the rz rotation and pick all the objects no matter which rz values they have.
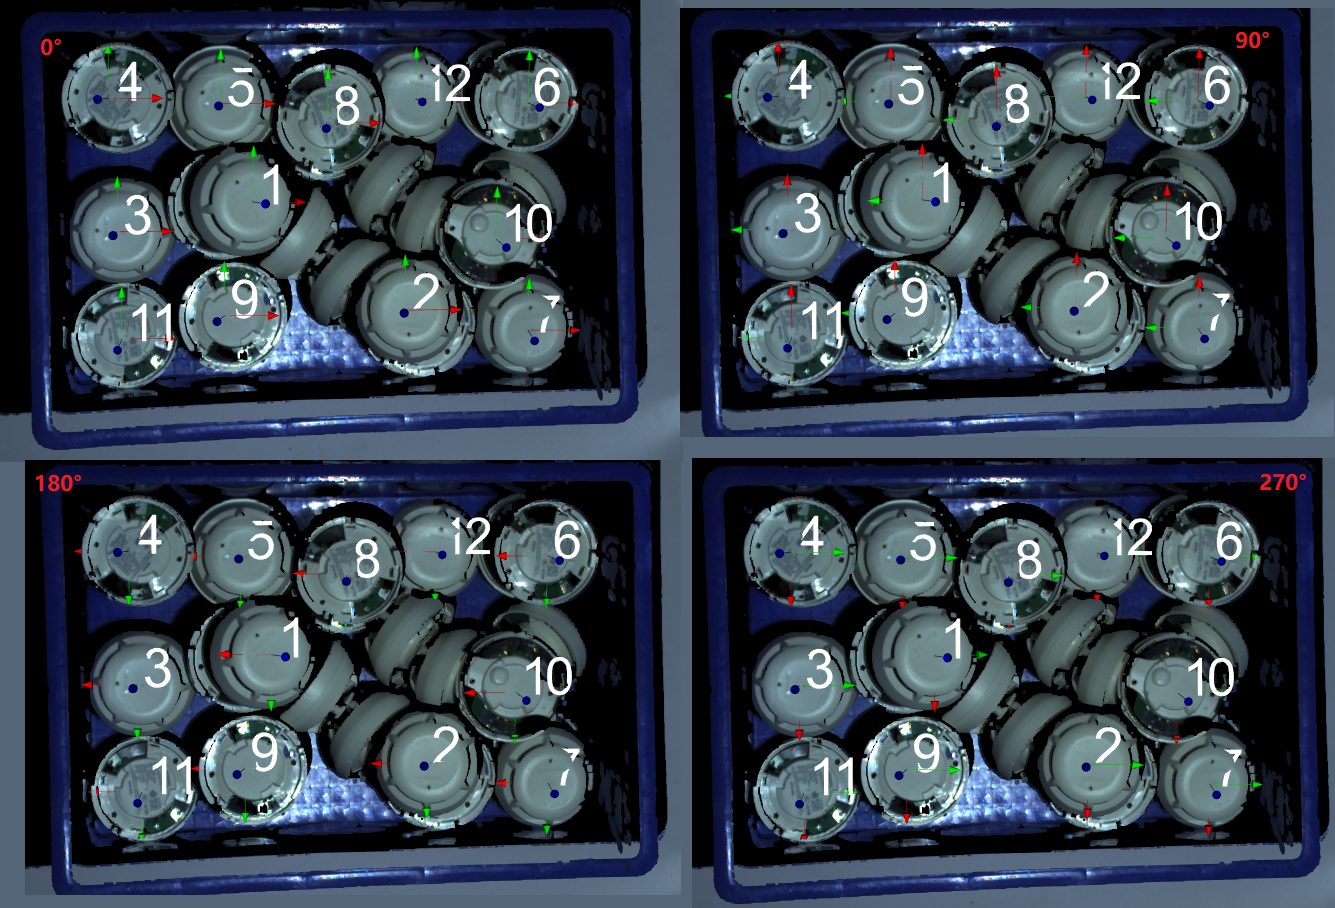
You can see that the Pick Sort node has a setting called Align Poses Orientation. This setting is able to change the sorted poses with same rotations. It can help you to align all the sorted poses with same x, y direction.

There are several degrees you can align these poses to: 0, 90, 180, 270 and towards reference frame:
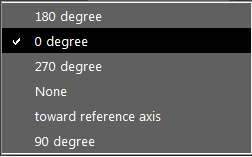
As it states from the options, the poses will rotate to such a degree.
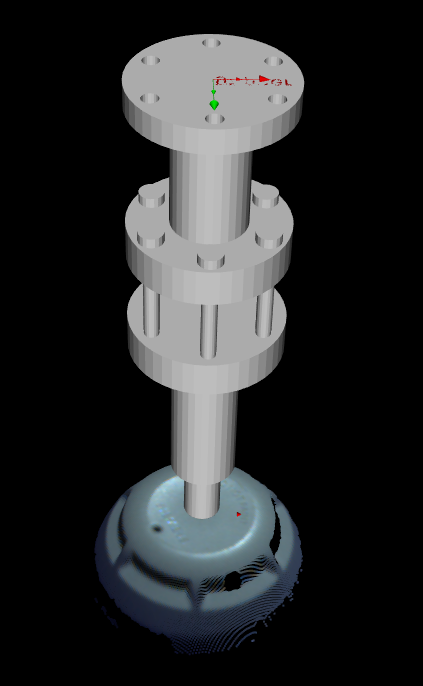
Another way to alter the pick pose rotation is the Gripper node. You can change the relation of Object -> Tool (or Tool -> Object, depending on how you build your Transformation Tree node). This relation has flexibility between gripper and object. By default, the relation is defined from your teach pose(Robot Read) or the value you input for virtual Pose Define process(like the image shown below).
You can use this flexibility to enable pick pose rotation on Z-axis:
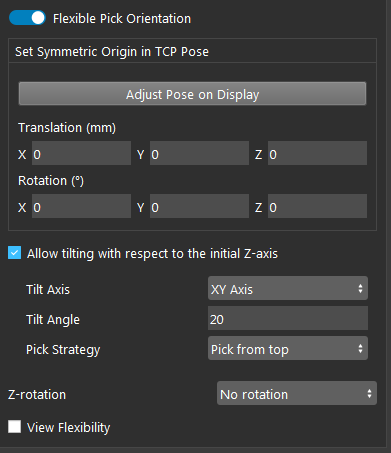
You can use this setting to allow the Tool picking with rotation at Z-axis no more than 180 degree or even full circle. This can achieve the same purpose like above using Pick Sort node rotation.

Pick Pose Tilting
In real world environment, objects tilt will always happen. If the objects are within an area with potential collision, sometime you might need to apply the tilting on poses in order to perform picking.
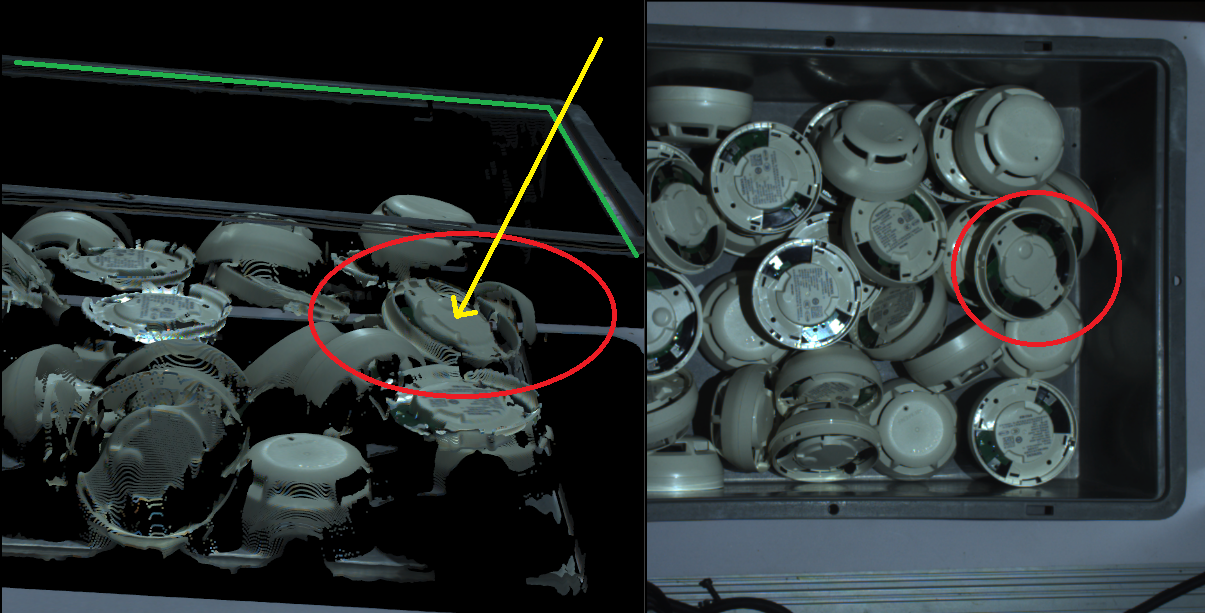
For example, the smoke detector with red circle is located closely to the edge of the basket. When Vision calculates the pick pose for this object, it is usually perpendicular to the object surface(it can be changed to perpendicular to the reference frame’s axises as well, let’s pretend the pick pose is perpendicular to object surface now). And if the robot is trying to pick this detector with this pick pose(indicated with yellow line), the robot arm is possibly going to collide with the edge of the basket.
In this case, applying 20-30 degree of tilt to the pick pose is still able to pick up the detector, and the robot is collision-free. Therefore, allowing proper amount of tilting is helpful.

Tile Axis is the setting of which axis/axises you allow this pose to tilt. You can tilt it with x & y axises, x-axis or y-axis.
The Tilt Angle is maximum angle you allow the pose to rotate.
Pick Strategy is the preference of this picking pose: Pick from Top or Pick with Less Tilt
Exercise
Try to come up with the setting on Pick Sort node according to the requirements below. You can work on these exercise with the help of this article. We also have answers attached at the end of this exercise.
This is some helpful resource when you are working on the exercise:
Scenario 1
There is a project which requires the robot to pick all the occurrences of the T-tube in scene. Your colleague has setup the 3D camera and robot in the lab for experiment. Here’s a link to .dcf file which are used as camera input.
You need to help him setup the Pick Sort node in main_flowchart. Please choose the all correct answers from the options:
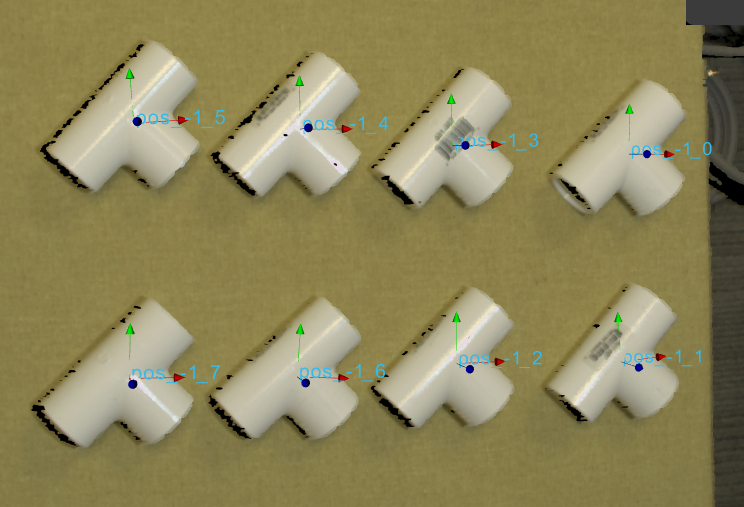
1. In the image below, you can see the detection result of the tee tubes. You are required to pick the tee-tubes by row, that is, pick the first row of tee-tubes first then the second row. How should you acchieve this?
As illustrated in the image. Now suppose you are required to have the gripper pick in a way that the left side (x-axis) of the gripper
- is always facing towards the bottom of the scene. How can you do this?
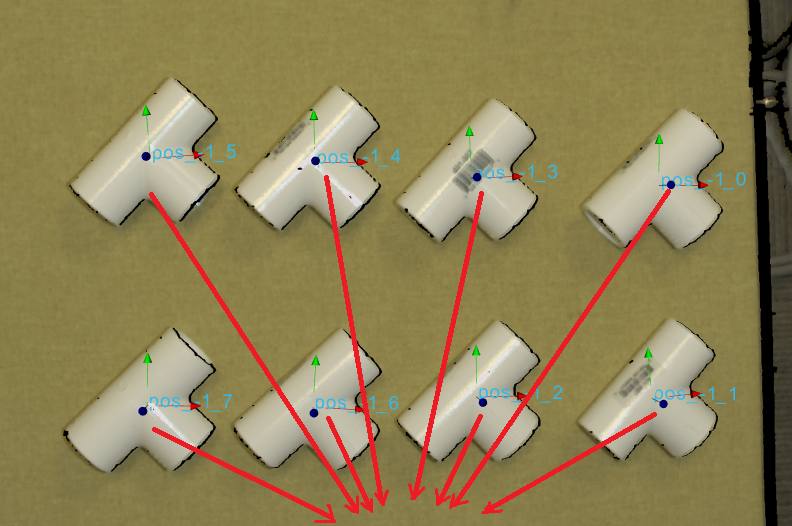
Set the reference frame to the bottom of the scene, and set Align Poses Orientation of Picksort Node to towards reference.
Set the reference frame to the top of the scene, and set Align Poses Orientation of Picksort Node to 180 degree.
Set the reference frame to the bottom of the scene, and set Align Poses Orientation of Picksort Node to 270 degree.
Both A & C.
Answers for Excercises
Scenario 1
Answer: C
Explanation: Recall that if looking the scene from top, the Y value is larger at the top and lower at the bottom. Therefore set Sort type to highest Y will pick the upper row first, then the lower row.
Answer: D
Explanation: Changing the Align Pose orientation will change the direction of the X-axis of the object pose, you can change the direction of where the x-axis is pointing by both rotation by degree or align towards a reference frame.
Answer: C
Explanation: Lock Poses Z Direction eliminates all poses with z direction that differs from the setting, and Changing it to positive will ensure that all the object poses’s z-axis will face up.
