You're reading the documentation for a development version. For the latest released version, please have a look at master.
Robot Write Node
Overview
Robot Write node allows the user to send a message to the robot.
Input and Output
Input |
Type |
Description |
|---|---|---|
Robot Source |
String |
The name of the robot system to receive the message. |
Status |
Int32 |
The status value to send to the robot. |
Pose Object |
Pose |
The pose to send to the robot. |
Payload 1,2,3,4,5,6 |
Int32 |
Extra messages for communication. (Optional) |
Output/ Print Message |
String |
The message to send to the robot. (Optional) |
Output |
Type |
Description |
|---|---|---|
last_command |
int |
The last command sent. |
message |
String |
The message sent to the robot. |
success |
Bool |
Indicates whether the write is performed successfully. |
Node Settings
Data Source
Robot Source:
Follow the following steps to add a robot:
- Click on Robot Write, and click ‘Open Platform Config’. Or you can click ‘Platform’ and click ‘Platform Configuration’ on the top menu bar.

- Select the Robots tab. Choose ‘Other’ as the Robot Type, then click ‘+’ add a robot.
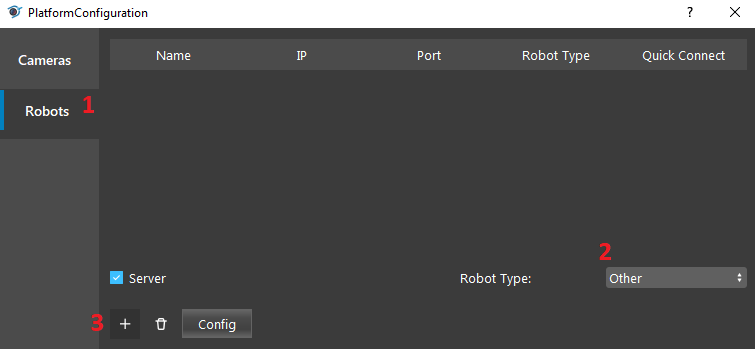
- Keep everything as default, check ‘Use String’, and ‘Connect’.
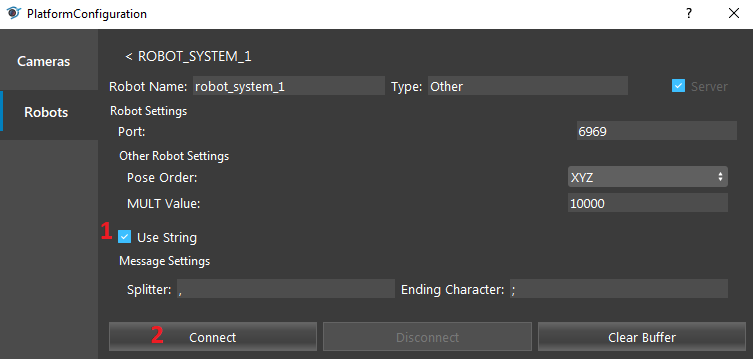
- You should see the console message “Server started on port: 6969” from the robot system you created.

- Port Number (Default: 6969):
The port number used for connection. Please make sure it is the same as it is in Hercules.
- Pose Order (Default: XYZ):
The type of rotation to be performed by the robot.
- MULT Value (Default: 10000):
The multiplication factor used for multiplying pose values.
- Splitter (Default: ‘,’):
The character that separates the message into different fields.
- Ending Character (Default ‘;’):
The character that marks the end of the message.
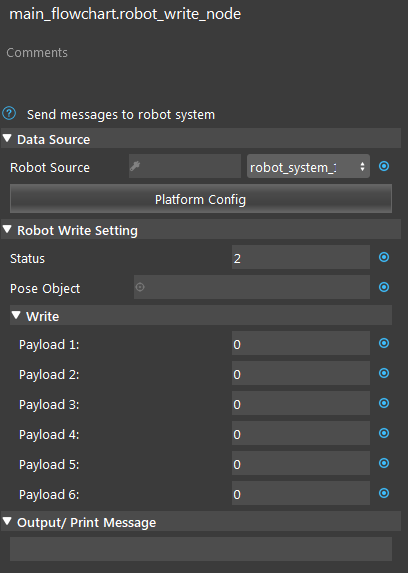
Robot Write Setting

Status:
The status value the robot receives from the program, which is used to decide the robot’s next action. Please refer to the Response Status section in the Robot Socket page for the status constants.
Pose Object:
The pose object to send to the robot for the robot to perform.
Write
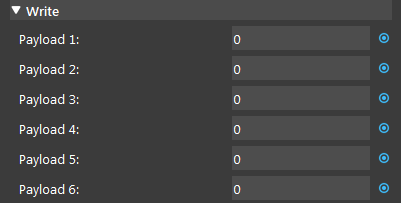
Payload 1,2,3,4,5,6:
Extra messages for communication. (optional) The payload fields are only required for certain commands.
Output/ Print Message

Writes a message to the console. (optional)
Procedure to Use
- Right click on the flowchart and click insert node, under the Robot Operation section, and select the Robot Write node.

- Click the Robot Write node, and select a Robot System. If you have not added a robot already, follow the steps in Data Source section.
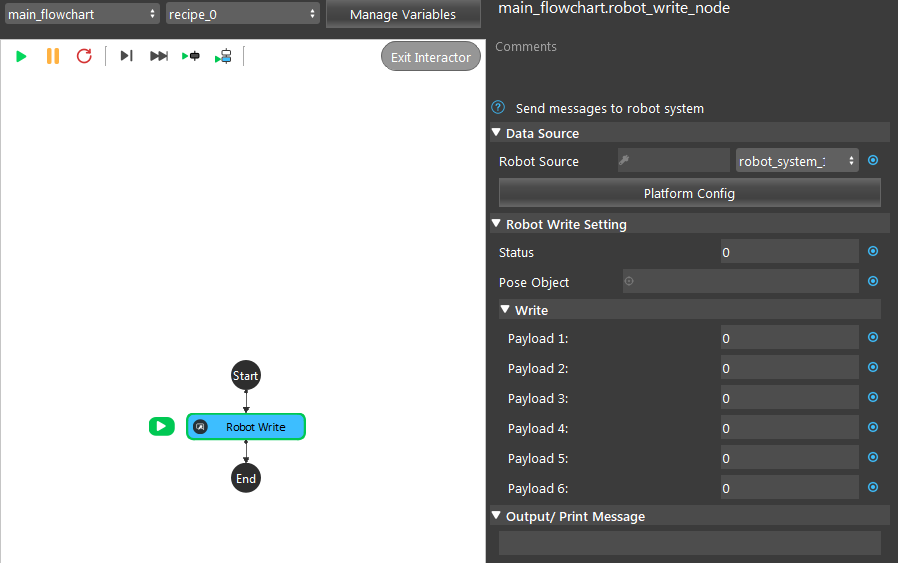
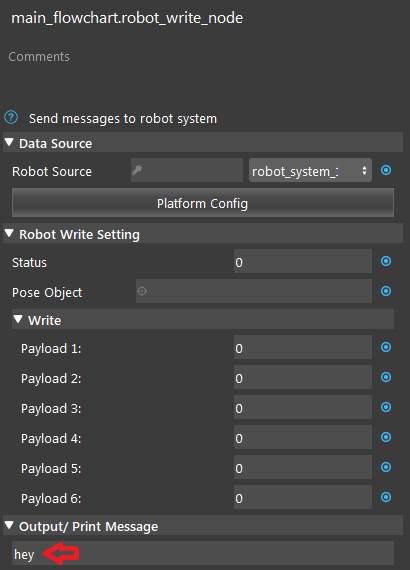
- In the Output/ Print field, type a message for the robot to write. (e.g. “hey”)
- In this case, we use the Hercules program for demonstration. Open the Hercules program. Click the third tab ‘TCP Client’, input Module IP 127.0.0.1, input port number 6969, and click connect. You should see the message “Connected to 127.0.0.1” in Hercules.

- Run the Robot Write node.
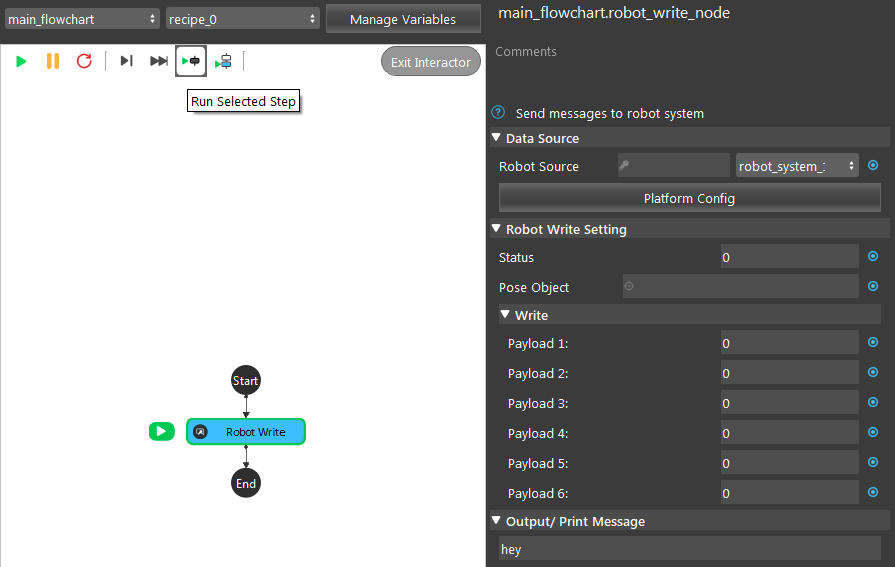
- You should see the message (“hey”) printed in the Hercules’ Received/Sent data window.

Exercise
In steps, explain the appropriate settings for the Robot Wrtie node based on the following information:
Instruct the robot to perform a pose, with any values you like.
Indicate that the object is found.
Answers for Exercise
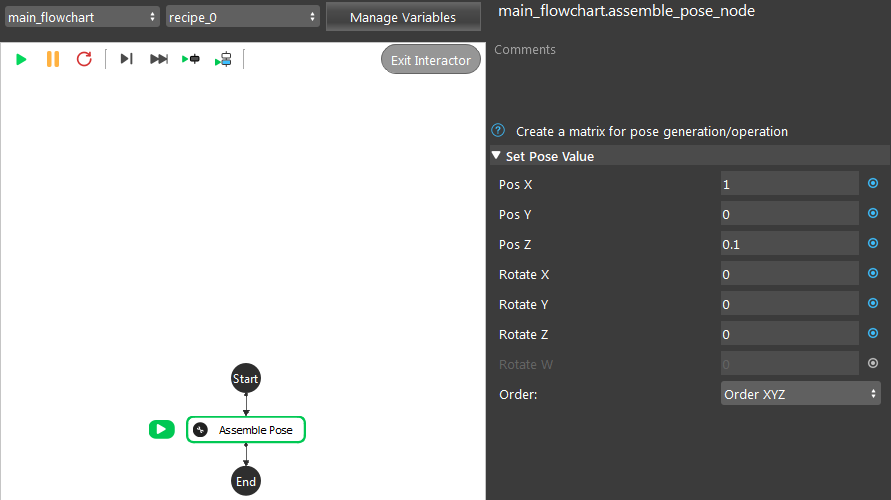
- Insert the Assemble Pose node (under the Utilities section) and set Pos X = 1 and Pos Z = 0.1.
- Insert the Robot Write node, and select the robot system to write to. Make sure the server is started up.
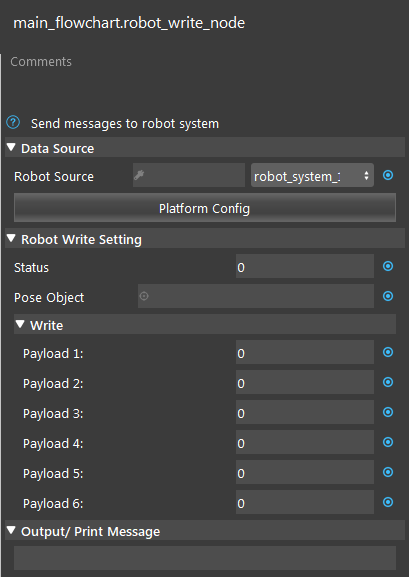
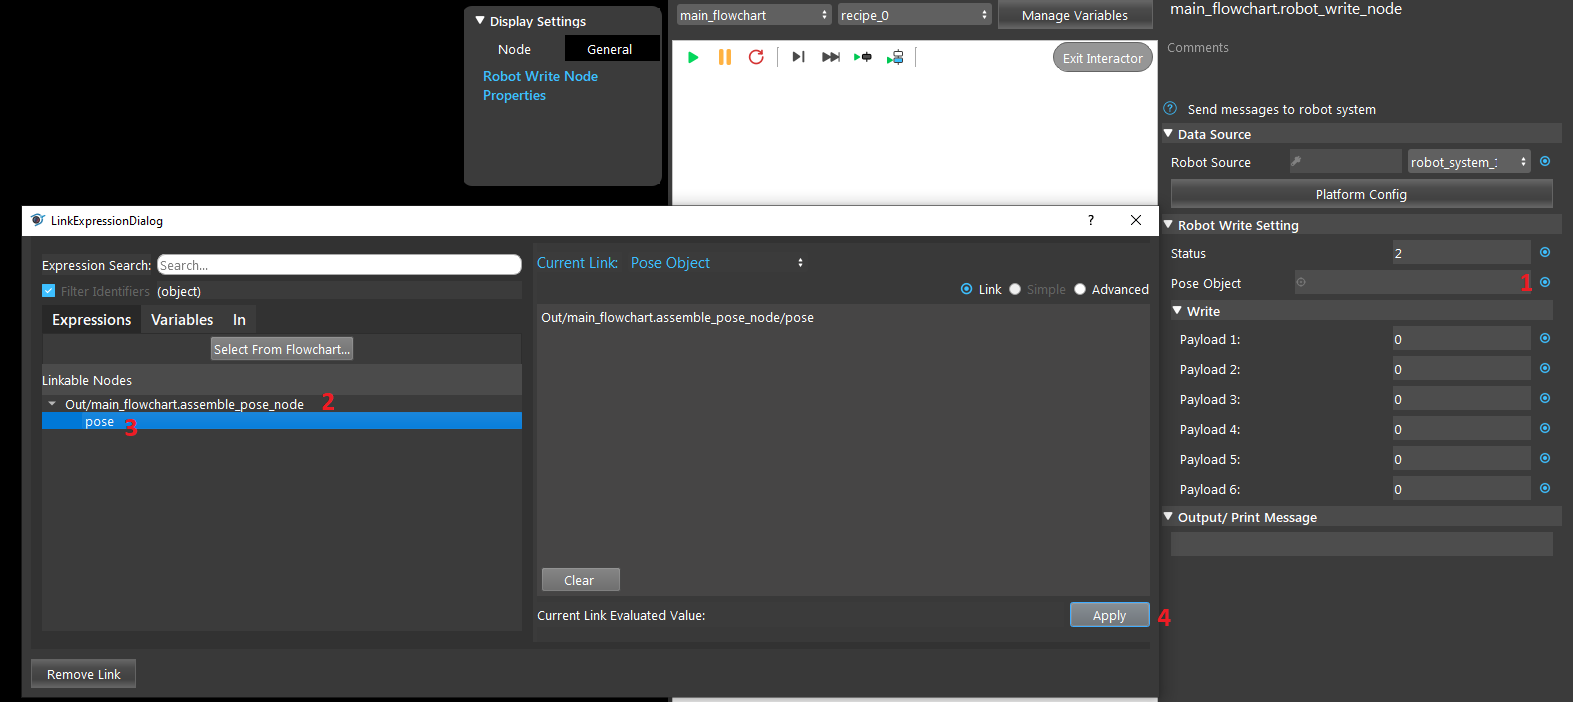
- According to Response Status, we need to set the status value to 2 to indicate that the object found.
- Link the pose object by clicking the blue circle next to the Pose Object field, and choose the corresponding pose object.
- Add a Halt node, set it to True, and connect to the server from Hercules.

- Run the flowchart. You should be able to see that the robot receives the pos X = 10000, and pos Z = 1000. The number is different from the values we entered in the Assemble Pose because they are multiplied by the MULT value set in the Platform Configuration when we added the virtual robot.
